Activity
Mon
Wed
Fri
Sun
Dec
Jan
Feb
Mar
Apr
May
Jun
Jul
Aug
Sep
Oct
Nov
What is this?
Less
More
Mylera Wellness
2k
Free
Sawinery Woodworking Guild
2.2k
Free
The Potted Garden Society
3.7k
Free
Julie's Garden Club
111
$5/m
Living Soil Community
1.4k
5.0
Free
Journey on Nature's Path
529
5.0
Free
36 contributions to The Potted Garden Society

Sep '25 •
Preserving Fresh Herbs: Freezing vs. Drying 🌿❄️☀️
Fresh herbs are a gardener’s treasure—fragrant, flavorful, and bursting with life. But when the harvest is bountiful, it’s hard to use them all before they wilt. That’s where preservation comes in! Two of the most popular methods are freezing and drying, each with its own perks. Let’s dive into the differences so you can choose the best way to keep your herbs lasting long past harvest day. ❄️ 𝐅𝐫𝐞𝐞𝐳𝐢𝐧𝐠 𝐇𝐞𝐫𝐛𝐬 Freezing is the closest you can get to preserving that “fresh-picked” flavor. 𝐇𝐨𝐰 𝐭𝐨 𝐅𝐫𝐞𝐞𝐳𝐞 𝐇𝐞𝐫𝐛𝐬: Whole leaves: Spread clean, dry leaves (like basil or parsley) on a baking sheet, freeze, then transfer to airtight containers. Ice cube method: Chop herbs, pack them into ice cube trays, and cover with water or olive oil. Pop out cubes and store in freezer bags for ready-to-use portions. 𝐁𝐞𝐬𝐭 𝐇𝐞𝐫𝐛𝐬 𝐟𝐨𝐫 𝐅𝐫𝐞𝐞𝐳𝐢𝐧𝐠: * Basil * Parsley * Cilantro * Dill * Chives 𝐏𝐫𝐨𝐬: * Retains fresh, vibrant flavor * Convenient pre-portioned cubes for cooking * Keeps bright green color in many herbs 𝐂𝐨𝐧𝐬: * Herbs may lose their firm texture—better for cooking, not garnishing * Requires freezer space ☀️ 𝐃𝐫𝐲𝐢𝐧𝐠 𝐇𝐞𝐫𝐛𝐬 Drying is the oldest preservation method and ideal for herbs that pack a punch when concentrated. 𝐇𝐨𝐰 𝐭𝐨 𝐃𝐫𝐲 𝐇𝐞𝐫𝐛𝐬: * 𝐀𝐢𝐫 𝐝𝐫𝐲: Tie small bundles of herbs (like rosemary or thyme) and hang them upside down in a cool, dry place. * 𝐎𝐯𝐞𝐧 𝐨𝐫 𝐝𝐞𝐡𝐲𝐝𝐫𝐚𝐭𝐨𝐫: Spread herbs on trays and dry at a very low temperature until crisp. * 𝐌𝐢𝐜𝐫𝐨𝐰𝐚𝐯𝐞 𝐦𝐞𝐭𝐡𝐨𝐝: Place herbs between paper towels and microwave in short bursts until dry. 𝐁𝐞𝐬𝐭 𝐇𝐞𝐫𝐛𝐬 𝐟𝐨𝐫 𝐃𝐫𝐲𝐢𝐧𝐠: * Oregano * Thyme * Rosemary * Sage * Mint 𝐏𝐫𝐨𝐬: * Long shelf life (up to a year when stored properly) * Doesn’t take up freezer space * Great for seasoning blends and teas 𝐂𝐨𝐧𝐬: * Some delicate herbs lose flavor intensity (like basil or cilantro) * Color often fades to dull green 🌿 𝐒𝐨… 𝐖𝐡𝐢𝐜𝐡 𝐒𝐡𝐨𝐮𝐥𝐝 𝐘𝐨𝐮 𝐂𝐡𝐨𝐨𝐬𝐞? * Want bright, fresh flavors for soups, sauces, and pestos? → Freeze them. * Prefer convenient, long-lasting storage for cooking blends and teas? → Dry them.

1 like • Sep '25
Thank you for the information.
Aug '25 •
And Our Winner Is.....
Check out the video to find out who won the August "Smells Like Summer Giveaway". Congrats to our winner. I'll be contacting you in a bit.

1 like • Aug '25
Congrats Diane
1 like • Aug '25
Hello Susan Johnson
0 likes • Aug '25
@Donna Scarborough I'm glad to hear that she's had good success with their seeds
Aug '25 •
DIY Self-Watering Container Using Two Buckets
𝑇𝑖𝑟𝑒𝑑 𝑜𝑓 𝑔𝑢𝑒𝑠𝑠𝑖𝑛𝑔 𝑤ℎ𝑒𝑛 𝑡𝑜 𝑤𝑎𝑡𝑒𝑟 𝑦𝑜𝑢𝑟 𝑝𝑙𝑎𝑛𝑡𝑠? 𝑇ℎ𝑖𝑠 𝑒𝑎𝑠𝑦 𝑝𝑟𝑜𝑗𝑒𝑐𝑡 𝑔𝑖𝑣𝑒𝑠 𝑦𝑜𝑢𝑟 𝑐𝑜𝑛𝑡𝑎𝑖𝑛𝑒𝑟𝑠 𝑎 𝑏𝑢𝑖𝑙𝑡-𝑖𝑛 𝑏𝑎𝑐𝑘𝑢𝑝 𝑠𝑦𝑠𝑡𝑒𝑚! Self-watering containers are a game-changer for container gardeners—especially during summer or for folks who can’t check on their plants every day. The good news? You don’t need a fancy setup. With just two 5-gallon buckets, a few basic tools, and a little time, you can build your own self-watering planter that keeps roots hydrated without the guesswork. 𝐖𝐡𝐲 𝐆𝐨 𝐒𝐞𝐥𝐟-𝐖𝐚𝐭𝐞𝐫𝐢𝐧𝐠? * Reduces watering frequency * Prevents overwatering or underwatering * Helps roots access moisture gradually * Perfect for vacations or hot-weather growing 𝐖𝐡𝐚𝐭 𝐘𝐨𝐮’𝐥𝐥 𝐍𝐞𝐞𝐝: * 2 food-safe 5-gallon buckets (one fits snugly inside the other) * A plastic cup or small container (to act as a water reservoir wick) * A piece of PVC pipe (about 1" diameter, 18" long) * Drill with 1/4" or 3/8" bit * Scissors or utility knife * Potting mix and your favorite plant 𝐇𝐨𝐰 𝐭𝐨 𝐁𝐮𝐢𝐥𝐝 𝐈𝐭: 🪣 𝐒𝐭𝐞𝐩 𝟏: 𝐏𝐫𝐞𝐩 𝐭𝐡𝐞 𝐈𝐧𝐧𝐞𝐫 𝐁𝐮𝐜𝐤𝐞𝐭 * Drill holes in the bottom of one bucket for drainage. * Cut a hole in the center big enough to fit your wick cup snugly. * Drill several small holes around the bottom for root access and aeration. 🧺 𝐒𝐭𝐞𝐩 𝟐: 𝐌𝐚𝐤𝐞 𝐭𝐡𝐞 𝐖𝐢𝐜𝐤 𝐂𝐮𝐩 * Take a plastic container (yogurt cup, sour cream tub, etc.). * Drill multiple holes in it—this will hold moist soil and wick water up to the plant. 🧪 𝐒𝐭𝐞𝐩 𝟑: 𝐀𝐝𝐝 𝐭𝐡𝐞 𝐅𝐢𝐥𝐥 𝐓𝐮𝐛𝐞 * Cut your PVC pipe at an angle on one end. * Drill a hole in the inner bucket lid or side wall and insert the angled pipe. * This pipe is where you’ll pour in water to fill the lower bucket. 💧 𝐒𝐭𝐞𝐩 𝟒: 𝐀𝐬𝐬𝐞𝐦𝐛𝐥𝐞 𝐭𝐡𝐞 𝐁𝐮𝐜𝐤𝐞𝐭𝐬 * Place the wick cup into the large center hole of the inner bucket. * Nest the inner bucket inside the second bucket (which holds the water reservoir). * Make sure the bottom bucket stays intact—no holes! 🌱 𝐒𝐭𝐞𝐩 𝟓: 𝐅𝐢𝐥𝐥 𝐚𝐧𝐝 𝐏𝐥𝐚𝐧𝐭 * Add potting mix into the wick cup and fill the rest of the bucket. * Plant your herbs, veggies, or flowers as usual. * Water from the top the first time to saturate the soil, then use the pipe moving forward.
1 like • Aug '25
Good stuff
Aug '25 •
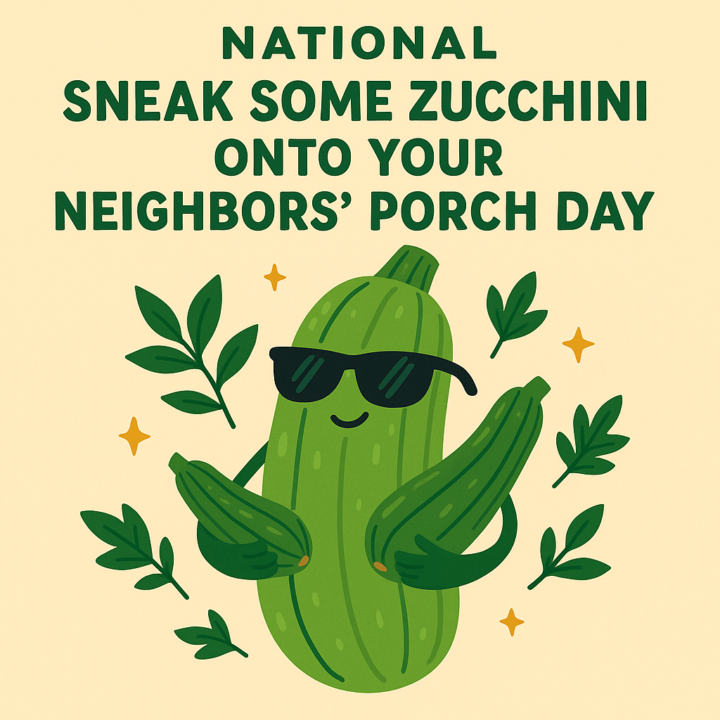
National Sneak Some Zucchini Onto Your Neighbors’ Porch Day
𝐂𝐞𝐥𝐞𝐛𝐫𝐚𝐭𝐞𝐝: 𝐀𝐮𝐠𝐮𝐬𝐭 𝟖𝐭𝐡 Zucchini lovers, beware... your container garden bounty might just overflow this summer—and August 8th is the perfect excuse to do something about it (sneakily, of course). Yes, 𝐍𝐚𝐭𝐢𝐨𝐧𝐚𝐥 𝐒𝐧𝐞𝐚𝐤 𝐒𝐨𝐦𝐞 𝐙𝐮𝐜𝐜𝐡𝐢𝐧𝐢 𝐎𝐧𝐭𝐨 𝐘𝐨𝐮𝐫 𝐍𝐞𝐢𝐠𝐡𝐛𝐨𝐫𝐬’ 𝐏𝐨𝐫𝐜𝐡 𝐃𝐚𝐲 is a real holiday, and it celebrates one of the most relatable moments in a gardener’s life: what do you do when your zucchini plant produces like it’s on a mission? The answer? Spread the green goodness—quietly and generously! 🥒 𝐖𝐡𝐲 𝐓𝐡𝐢𝐬 𝐇𝐨𝐥𝐢𝐝𝐚𝐲 𝐄𝐱𝐢𝐬𝐭𝐬 (𝐀𝐧𝐝 𝐖𝐡𝐲 𝐆𝐚𝐫𝐝𝐞𝐧𝐞𝐫𝐬 𝐋𝐨𝐯𝐞 𝐈𝐭) * Zucchini is notorious for its enthusiastic growth. One minute you’re admiring a cute little squash, and the next—bam! It’s the size of a Louisville slugger. * This tongue-in-cheek holiday encourages gardeners to share their harvest... preferably under cover of darkness and with a healthy sense of humor. 🪴 𝐂𝐨𝐧𝐭𝐚𝐢𝐧𝐞𝐫 𝐆𝐚𝐫𝐝𝐞𝐧𝐞𝐫𝐬 𝐂𝐚𝐧 𝐉𝐨𝐢𝐧 𝐭𝐡𝐞 𝐅𝐮𝐧 𝐓𝐨𝐨 * Even if you only have one or two zucchini plants growing in pots, chances are you've harvested more than enough to go around. * Don’t let extra squash go to waste! * It’s a great way to share the joy of growing your own food. * Who doesn't love a surprise delivery of garden-fresh veggies? 👣 𝐇𝐨𝐰 𝐭𝐨 𝐒𝐧𝐞𝐚𝐤 𝐙𝐮𝐜𝐜𝐡𝐢𝐧𝐢 𝐋𝐢𝐤𝐞 𝐚 𝐏𝐫𝐨 * Pick Your Target Wisely: Neighbors, coworkers, friends, your dog groomer—anyone who looks hungry and unsuspecting. * Choose the Perfect Zucchini: Maybe not your biggest (that’s for bread), but still firm, fresh, and presentable. 𝐀𝐝𝐝 𝐚 𝐓𝐚𝐠 𝐨𝐫 𝐍𝐨𝐭𝐞 (𝐎𝐩𝐭𝐢𝐨𝐧𝐚𝐥): * “Happy Sneak Some Zucchini Day! 🥒 From your mysterious veggie benefactor.” Or include a recipe idea! * Drop and Dash: Place it gently on their porch, doorstep, or mailbox. Knock or ring if you're brave. Then vanish into the night like a garden ninja. 🍞 𝐁𝐨𝐧𝐮𝐬 𝐅𝐮𝐧: 𝐒𝐡𝐚𝐫𝐞 𝐭𝐡𝐞 𝐑𝐞𝐜𝐢𝐩𝐞𝐬 If you’ve got more zucchini than stealth, try: * Zucchini fritters * Chocolate zucchini cake * Stuffed zucchini boats * Classic zucchini bread Then bring the extras and a few printed recipes to your next community event, garden club, or Potted Garden Society discussion thread!
1 like • Aug '25
Sounds like a great idea
1-10 of 36

@steven-wyberg-5737
Hobby beekeeper. enjoy fishing and firearms.
Living in Texas
Active 84d ago
Joined Jun 13, 2025
Spring Texas
Powered by