Activity
Mon
Wed
Fri
Sun
Jul
Aug
Sep
Oct
Nov
Dec
Jan
Feb
Mar
Apr
May
Jun
What is this?
Less
More
Memberships
SOLIDWORKS Course Pro
66 members • Free
SOLIDWORKS Accelerator
2.3k members • Free
438 contributions to SOLIDWORKS Accelerator

Jan '25 •
Why i Didn't post anything???
Over the past three months, I’ve been completely focused on my Solid Edge course, which is why I haven’t posted any updates. But I’m excited to share that I’ve passed the Associate-level certification exam! I’m now a certified Solid Edge user with practical experience, and I can’t wait to share my certificate soon.


3 likes • Jan '25
Good stuff, How do you prefer Solid Edge to SW? Does your company/employment demand Solid Edge?

Jan '25 •
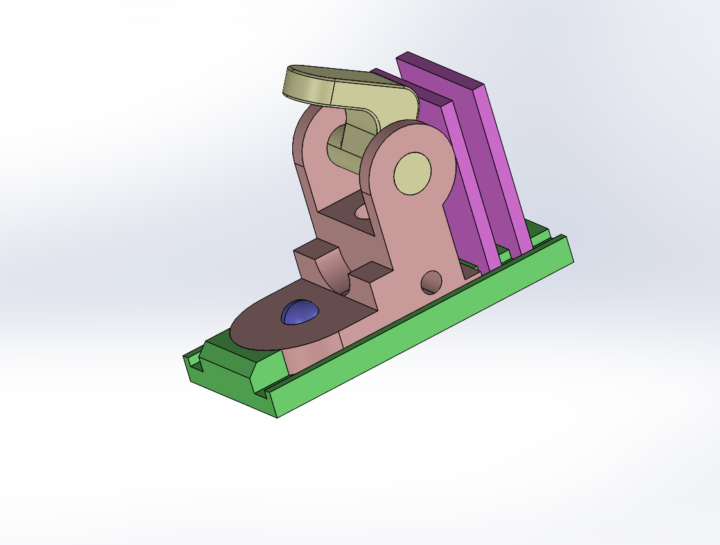
Finished Assembly Section
Just finished assembly section. Very helpful project to learn different parts of the workflow. One question I have is: in the end component P2 ended up not fixed in my assembly because I was running interference detection. I couldn't figure out how to have the component fixed and not interfere with components P4 when it rotates. Any ideas?
1 like • Jan '25
Good day, the component should intersect on rotation. This is purposely done, to complete the lesson on collision detection. Once you finish that lesson, you can right click the component and click on FIX to lock it in place.

Dec '24 •
Jack the Pumking King: Base, Head and a bowtie that I couldn't fit.
Good afternoon everyone and a happy new year. For the past 20 days I've been working on this project. It's not just a 3D model for the sake of it, but rather the template for it's 3D printing, so I had to make the dimensions somewhat realistic. It took some time, effort and mathematical modeling, but I got there. I'm attaching the whole thing below, for anyone who wants to check it out.
4 likes • Jan '25
Use this cool workaround to select that hidden face: 1. Press F5 on your keyboard, to open the selection filter, or option 2, press X as a shortcut to auto go into FACE ONLY select mode. 2. Now press CTRL + A to select all objects (but in step 1, you were FACE ONLY), so all faces will be selected. 3. Now right-click and finally click on Change Transparency.
2 likes • Jan '25
@Zacharias Kourelis Perfect, Glad to help.

Dec '24 •
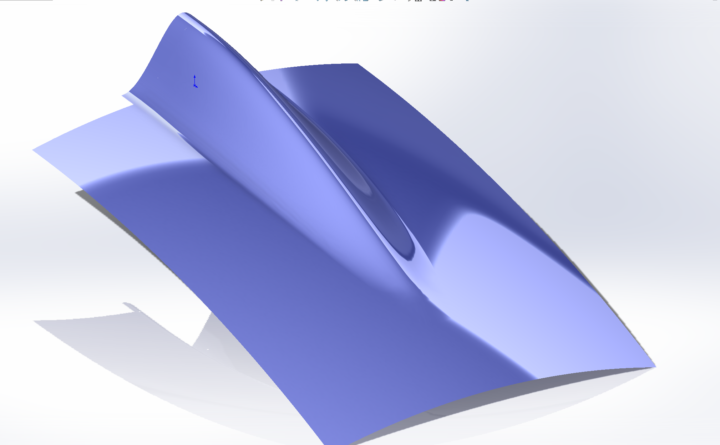
Learning the deep magic
Wow, surface blending can be hard. Here is a whole morning of ***king around (Working from Matt Lombard - SolidWorks Surfacing and Complex Shape Modeling Bible)
3 likes • Jan '25
@Jesse Davis Autodesk always plays its cards well, even providing Fusion for free to students they have just made their user base go crazy huge. Coming to Rhino one more thing that nobody can take away is Grasshopper, that thing is one power piece of code.
3 likes • Jan '25
@Jesse Davis haha, the bottom line is never package a single platform at all costs, milk out more separate subscriptions.
Dec '24 •
Cat/Bat face
Here is an interesting design of a cat or bat face. I'm attaching the SW part below for anyone interested to check it out.
2 likes • Jan '25
Yes, i'm loving the offset from surface to define these cuts.
1-10 of 438

Active 362d ago
Joined Jul 6, 2024
Powered by