
Write something

Apr 9 •
Video - Painting FDM terrain to minimise the visibility of the print layers
Hi all. I made a video a while back and I thought it would be a good one to share. I printed a lot of terrain for our game Crystal Collapse using an FDM printer for the first time. Its all very highly stylised into a square grid format (akin to the terrain you'd see in games like Final Fantasy Tactics or Fire Emblem) so not realistic at all, but perfect for the game. I wanted to paint it in a stylised way too, and I was also conscious that I wanted to minimise the visibility of the lines on the print so I opted to stipple a thick base layer using a cheap, craft acrylic paint, and then proceeded to overbrush a few layers of progressive highlights and then brushed in a layer of shading glaze to add more contrast. Overall I'd call it a success and I definitely achieved my goals on it. Check it out and let me know what you think. Would you try this method out yourself, or is there anything you'd personally have done differently?
1
0
Jan 2 •
🎨New Year Painting Challenge🎨 plus a £10 gift voucher for participating!
🎉 Happy New Year, you wonderful paint-splattered legends 🎉 New year. Fresh brushes. That one miniature you’ve been “saving for when I’m better”… yeah, that one! Rather than vague resolutions like “I’ll paint more this year” (we all know how that goes), I want to kick off a simple, focused New Year Painting Challenge that actually levels up your skills. 🎯 THE CHALLENGE! Pick ONE core painting skill to focus on, then paint a miniature with that as your main goal. Not perfection. Not speed. Just intentional improvement. Here are a few suggestions: 🧑🎨 1. Flesh with Depth & Life No more flat, peachy humans that look like they’ve been stored in a drawer since 1997. Focus on: - Adding thin glazes of purples and reds in the shadows - Creating depth through mixing colours into your fleshtones, not just darker or lighter flesh tones - Making skin feel alive, not sun-burnt, flat or plastic Bonus points if the miniature looks like it has blood in it rather than being carved from spam (tangent - if your brain just kicked into the Monty Python Spam song, you're definitely one of my people! haha!). ⚔️ 2. Non-Metallic Metal (NMM) Love it or hate it, NMM forces you to understand light properly. There is no hiding here. I committed to NMM last year with Crystal Collapse and seriously have been regretting the choice, but I'm happy with the look of it and I feel like I've improved a lot over the year. Focus on: - Clear light placement - Strong contrast - Use of a variety of colours - Selling the illusion of metal, not just blending for the sake of it Even a single sword or shoulder pad counts. You don’t need to NMM the entire miniature and lose the will to live - trust me!! 🛡️ 3. Battle Damage & Wear This is one of the most underrated skills in miniature painting and makes any model look more believable. Focus on: - Painting non-sculpted damage (a thin dark line and then highlight the bottom edge of the line. - Scratches, scuffs, worn edges - Subtle cracks in armour, chipped paint, tired leather
3
0

Nov '25 •
Basing Your Minis
Some of you maybe familiar with Squidmar? I always find myself coming back to this video, it's probably the most comprehensive list of basing materials I've ever found so I just thought I'd share. I'm always looking for natural bits and pieces when I'm out on walks and such, it can save you so much money. It's totally worth the effort, a good base can literally catapult your minis from awesome to god tier
Oct '25 •
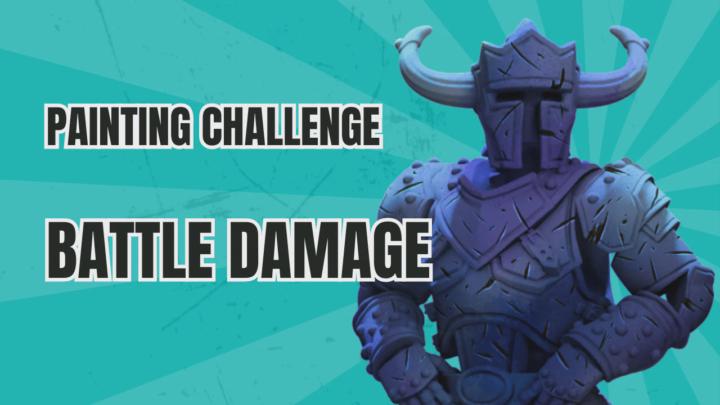
PAINTING CHALLENGE! BATTLE DAMAGE! (including FREE STL)
Hi all! As we're approaching the weekend, I thought it might be nice to share a mini project for you - painting challenge to help keep you busy. Brief: Paint a model with realistic battle scars and wear. This will enhance your skills in weathering and creating narrative details. Difficulty: ⭐⭐⭐☆ ☆ (Medium) Challenges: Precision and keeping your hand steady when painting the highlights on your scratches. Being consistent with your highlight placement - irregular placement will make your battle damage look off. Tips: - Use a brush with a good fine tip - it doesn't have to be a tiny brush, but one with longer bristles will help you with keeping a straight thin line - Be super light with your touch and use only the very tip of the brush to get the thinnest lines - As Bob Ross used to say "2 hairs and some air"! - Use a model that doesn't have sculpted battle damage so you can see the effect at it's best. Done right you won't notice that the damage effect is painted on a smooth undamaged surface. - If you're going to be glazing shadows and highlights onto your model, you can do them after you've painted the battle damage onto the base colours and it will soften the effect of the damage a bit and make it blend with the model better. you can then do a second pass of damage to create some more extreme contrasting elements. Step-by-Step: 1. Paint the model: It sounds over-simplistic, but first you need to paint the model to a finished level with your choice of colours. Include shadows and highlights. 2. Damage Areas: Using a fine brush, paint small lines and chips in a dark colour to represent scratches and dents. I recommend Vallejo armour brown, or a similar dark brown colour. you could use a darker shade of the base colour if you prefer, but a dark brown is usually a good bet. 3. Highlight Damage: Add lighter colours to the edges of the dark lines to create depth. This should be a lighter version of whatever colour you have used for the base colour of the item to be damaged Avoid pure white or your highlights will be too stark. 4. (OPTIONAL) Rust and Wear: Apply brown and orange washes to metal areas to simulate rust. 5. Finishing Touches: Drybrush, stipple or dot metallic colours lightly over the edges to create a worn effect. This is more useful if you're painting something that is supposed to look like painted metal, so it'll look like the paint has chipped off and broken away.
3
0
Aug '25 •
Painting FDM Terrain - Overcoming the limitations of FDM prints
I've been resin 3D printing since 2016 and have learned an awful lot since then - in fact I consider myself to be something of an expert when it comes to getting great quality resin prints. And becasue I love miniatures so much, including painting them, the surface quality issues present in FDM prints have historically put me off wanting to go near them. About a month ago, I ended up pulling the trigger on an FDM printer purchase so I have something that I can use for testing and also making larger models. I thought I'd test my new printer out by making some of the terrain elevations (kind of like hills but in a grid based system). Long story short, I had no idea what I was doing so I set the layer height to as low as I could possibly go and made sure I turned on the ironing setting on all top surfaces to try to get rid of the horrible stepped surfaces that are typical of FDM. Despite my inexperience, the prints were a relative success, with only a few minor flaws. Now to paint them and record it all for your viewing pleasure! I'd already digitally painted one of these hills in zbrush so I had an idea of what I was aiming to achieve, but normally I'd do it with glazes and lots of layering, and a bit of drybrushing. None of these felt like viable options if I wanted to disguise or overcome the layer lines in the print so I needed to get creative. I decided to use a thick acrylic paint called Raw Umber from Castle Art Supplies - I think it was purchased from The Works and it wasn't expensive. Colour wise its a warm, mid-dark brown colour edging towards a milk chocolate type colour. I grabbed the biggest, scabbiest brush I own which is my old Citadel tank brush from the early-mid 2000s and I roughly stippled the thick paint all over, trying not to spread it out too thin. I had to leave it to let it dry for a while, and when I came back to resume, I realised that I'd not saved the footage of that first part of the paint job! Then I moved on to overbrushing/drybrushing. I did this in 4 phases:
2
0
1-5 of 5
powered by

skool.com/lions-tower-miniature-academy-2399
Your miniature mastery starts here: sculpting, printing, painting & pro insights to elevate your skills!
Suggested communities
Powered by