Activity
Mon
Wed
Fri
Sun
Aug
Sep
Oct
Nov
Dec
Jan
Feb
Mar
Apr
May
Jun
Jul
What is this?
Less
More
Owned by Dan
Your miniature mastery starts here: sculpting, printing, painting & pro insights to elevate your skills!
Memberships
Skoolers
166.4k members • Free
27 contributions to Lion's Tower Miniature Academy

Apr 9 •
I'm preparing some valuable content and need your input!
Good morning all! I've put my sculpting course and chainmail tutorial in the courses available to premium members, but I want to make sure that there is useful and valuable content in there that is exclusive to you guys here in this community. What I'd like to know though is are there any topics that you'd like to deep-dive into and get some instruction and direction on? Could be digital sculpting, putty sculpting/conversions could be painting, modelling, terrain building - take your pick! Let me know in the comments and I'll get cracking and start making videos and documents to scratch your itches!
1 like • 30d
Hi Rob, sorry for the delayed response! I honestly thought I'd replied to this one already! I frequently bolster dynamic poses with tactical rocks and foliage to help support the model - it's not just about the contact surface area, but also about the strength of the connecting limbs. Ankles are often a weak point and without clothing or armour to thicken them they can be even more precarious, so it's worth adding extra connection points to help the model survive. Branches, rocks, cloth, cloaks and all other manner of extras can serve this purpose, sometimes in combination with others. As to whether they perform better, that's a tricky question and unfortunately I don' have any metrics to say one way or another. There's a lot to be said for a good steady stoic pose, as much as there is for a hugely dynamic one, but I'd suggest for general gaming you want to lean towards stability, and for display pieces you can go to town!
30d •
Welcome to all the new members!
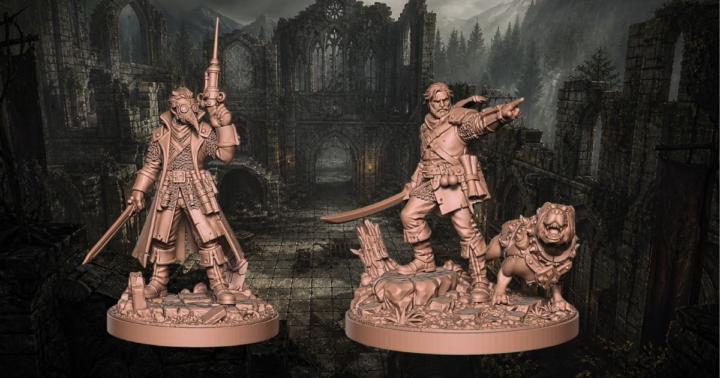
We've just passed 80 members which is an awesome achievement so far. Those of you who have recently joined, I'd like to invite you to introduce yourself and let us know what you're looking for here so we can best meet your needs. Head to the following pinned post and say hi: https://www.skool.com/lions-tower-miniature-academy-2399/starting-from-scratch?p=1eeccf42 I've had a few interesting conversations recently which I'll share here shortly, but if anyone is looking to be moving towards selling a miniature line, I've got a perfect solution that minimises your outgoings, gives you the benefit of some passive marketing and lets you sell physical and digital miniatures without having to get your hands dirty. Plus - full colour prints of your models - and this one blew me away! Keep your eyes peeled over the coming days. I'll also be painting my new miniature sculpts (pictured) and I'd like to know if anyone would be interested to see the painting process - I may do it as a live stream or perhaps just record parts as a demo - let me know what you'd all prefer. Cheers all! Speak soon! Dan
May 19 •
Beautiful Renders and Broken Promises: Why Crowdfunded Miniatures Need to Be Designed for the Real World
Good afternoon you beautiful people! I’ve just published a new article on something I think is becoming a real issue in tabletop crowdfunding: Beautiful 3D renders that won't actually work as real miniatures. We’re seeing more campaigns showing models with ultra-thin weapons, delicate tassels, tiny chains, floating cloth strips, micro-detail, realistic seams, AI-inspired design clutter, and all sorts of visually impressive elements that look great on a screen… …but may be an absolute nightmare to 3D print, cast, mould, paint, or manufacture at 32mm scale. A render only has to look good - A miniature has to survive the real world. That means sensible and appropriate part thickness, readable detail, strong shapes, paintable surfaces, and designs that are made with the final production method in mind. This isn’t about attacking specific creators or saying every project needs final production samples before launch. Small indie companies (myself included) often have to work in stages, but I do think campaigns need to be clearer about what is concept art, what is a render, what has been test printed, and what the final product is likely to look like, becasue many renders I'm seeing lately will never make it to production looking even close to what is being marketed. Backers should feel comfortable asking to see physical prints before pledging, especially when a model looks extremely delicate or overloaded with detail. In fact, photos of a physical product over a render should be the norm when it comes to seeking funding as a proof of concept. I go into this properly in the full article, including the warning signs to look for and why AI-led or video-game-style sculpting can create real production problems for tabletop miniatures. You can read the full article here: https://thelionstower.com/blogs/news/beautiful-renders-and-broken-promises-why-crowdfunded-miniatures-need-to-be-designed-for-the-real-world
3
0
Apr 9 •
Video - Painting FDM terrain to minimise the visibility of the print layers
Hi all. I made a video a while back and I thought it would be a good one to share. I printed a lot of terrain for our game Crystal Collapse using an FDM printer for the first time. Its all very highly stylised into a square grid format (akin to the terrain you'd see in games like Final Fantasy Tactics or Fire Emblem) so not realistic at all, but perfect for the game. I wanted to paint it in a stylised way too, and I was also conscious that I wanted to minimise the visibility of the lines on the print so I opted to stipple a thick base layer using a cheap, craft acrylic paint, and then proceeded to overbrush a few layers of progressive highlights and then brushed in a layer of shading glaze to add more contrast. Overall I'd call it a success and I definitely achieved my goals on it. Check it out and let me know what you think. Would you try this method out yourself, or is there anything you'd personally have done differently?
1
0
Mar 19 •
Advice for success - in hobby and in life!
I was asked recently by a good friend if I could offer any advice from the point of view of a professional, commercial artist to those looking to embark on a career in art. I came up with many gems, but the following for me is one of the single most important things that you should take onboard. Mindset, focus, and what people like to call manifestation all point to the same thing: what you believe to be true shapes the actions you take, and the actions you take shape your results. It doesn’t matter whether you think the universe is helping you or you think that’s all crystal-shop nonsense — the mechanism still works. You must decide, in your own head, that your success is inevitable. Not “I hope I make it”, not “maybe one day”… but “this is happening, now let’s build it.” Don’t discount this I’ve studied a lot of successful business people over the years — multi-millionaires, billionaires, founders, creators — and a fascinating pattern shows up again and again. They don’t talk about if they’ll succeed. They talk about how and when. Failure simply isn’t on the menu. Listen to something like The Diary of a CEO podcast and you’ll hear this mindset constantly: relentless belief, long-term focus, and an unshakeable expectation of success. They might not call it manifestation, but it is — unwavering belief driving behaviour until the outcome becomes unavoidable. Your brain backs this up. It has a built-in filtering system called the Reticular Activating System (RAS). Its job is to decide what information matters and what gets ignored. It doesn’t judge what’s true — it looks for evidence of whatever you already believe. If you believe you’re not good enough, your brain will serve you endless proof: slow sales, rejections, other artists “doing better”. If you believe you are becoming successful, your brain starts highlighting opportunities, connections, and openings that were always there — you just weren’t tuned to see them. It’s like being told to look for red cars on your way to work. Suddenly they’re everywhere. Then ask how many yellow cars you saw on that same journey and you won’t have a clue — your brain filtered them out. This is why negative self-talk is poison for creative businesses. You are literally instructing your own mind to hide opportunities from you. And this advice comes directly from experience - I’ve been there and made this realisation the hard way!
0 likes • Mar 25
@Wagner Carvalho A pleasure! Glad you found it useful!
0 likes • Apr 9
@Cez Rogers no worries!
1-10 of 27

@dan-kelly-4221
A business owner and professional sculptor and artist. I also have background in facilities management and HSE management.
Active 30d ago
Joined Aug 26, 2025
Solihull, UK