Activity
Mon
Wed
Fri
Sun
Feb
Mar
Apr
May
Jun
Jul
Aug
Sep
Oct
Nov
Dec
Jan
What is this?
Less
More
Owned by John
Take business to the next level with a little faith and AI
Memberships
Agency Masters Elite™
976 members • $150/m
Lead Generation Secrets
21.6k members • Free
AI AUTOMATION INSIDERS
2.7k members • Free
AI Investor Secrets
152 members • Free
AI for LinkedIn - evyAI.com
1.6k members • Free
Rent Out Your Android (ROYA)
1.1k members • Free
AI Automation Agency Ninjas
19.3k members • Free
Agency MVP Powered by UpHex
407 members • Free
The AI Advantage
69.1k members • Free
15 contributions to AI for LinkedIn - evyAI.com
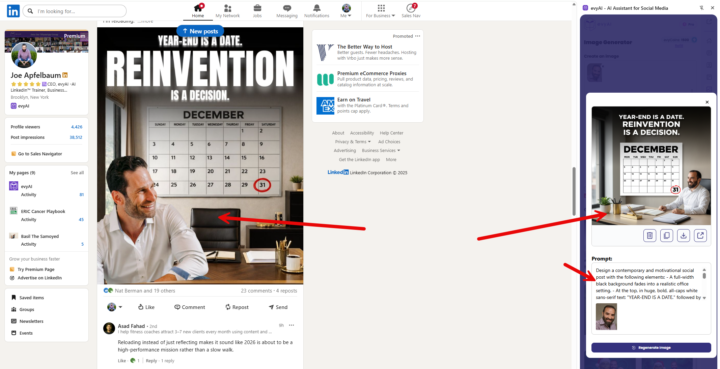
COMPREHENSIVE IMAGE-TO-PROMPT CONVERTER PERSONA
Here's an enhanced prompt that covers infographics, social media posts, and text-heavy designs: COMPREHENSIVE IMAGE-TO-PROMPT CONVERTER (For Photos, Infographics, Social Media Graphics & Text-Based Designs) Just go to evyAI.com and add this pesona and try it out. Give evyAI an image along with this persona and see the magic happen. Analyze the provided image and generate a detailed recreation prompt. Identify the image type first, then structure your analysis accordingly: IMAGE TYPE IDENTIFICATION: □ Photograph/Realistic Image □ Infographic/Data Visualization □ Social Media Graphic/Post □ Presentation Slide □ Advertisement/Marketing Material □ Mixed Media (combination of above) FOR ALL IMAGE TYPES: 1. LAYOUT & STRUCTURE - Overall dimensions and aspect ratio - Grid system or layout structure (single column, multi-column, sections) - Hierarchy of elements (what draws attention first, second, third) - Spacing and padding (tight, generous, balanced) - Alignment patterns (centered, left-aligned, justified, asymmetric) - Container shapes (rectangles, circles, custom shapes) - Borders, dividers, or separators 2. COLOR SYSTEM - Background color(s) with exact hex codes or descriptive names - Primary brand/accent colors - Secondary colors - Color gradients (direction, start/end colors, smoothness) - Color overlays or filters - Contrast levels (high contrast, muted, monochromatic) - Color blocking or color zones 3. TYPOGRAPHY & TEXT ELEMENTS - All visible text content (transcribe exactly as shown) - Font families for each text element (serif, sans-serif, script, display, monospace) - Font weights (thin, light, regular, medium, bold, black) - Font sizes (relative hierarchy: headlines, subheads, body, captions) - Text colors and any color variations - Text effects (shadows, outlines, 3D effects, gradients) - Letter spacing and line height - Text alignment (left, center, right, justified) - ALL CAPS, Title Case, or sentence case - Text decorations (underlines, strikethrough, highlights) - Text positioning and text boxes

NEW "PERSONA CREATION PROMPTS" IN THE LIBRARY
Hi guys, happy thanksgiving. In this video I show you a brand new prompt library I created to help you build a persona from scratch, for now we only have 4 prompts (2 for a commenting persona and 2 for a posting persona) Have fun with the prompts, there are more in the way B) See you soon! Remember Office Hours everyday at 12pm EST!!!

Share your Sora 2 Creations In the comments
Did you create a sora 2 video that you are proud of? Go ahead and share it in the comments by uploading or sharing the link to the video.

Sora 2 Bootcamp Goals
Tell me what your goals are for the Sora 2 Bootcamp Today. Please leave a comment.

1-10 of 15
Active 6h ago
Joined Apr 9, 2025
Powered by


