

🔥
25d •
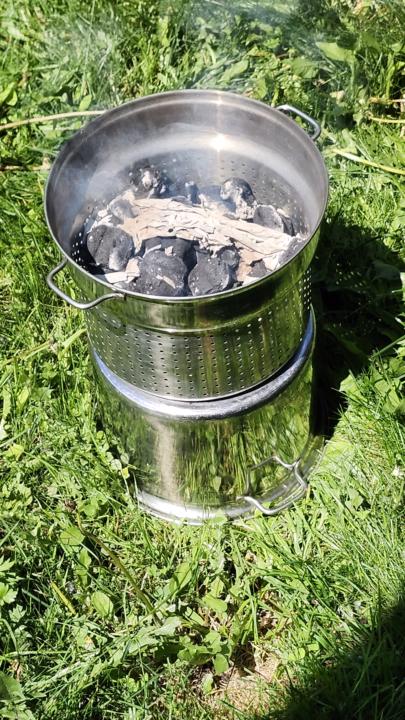
The Impromptu BBQ
Spending the next 2 days with the girlfriend on her days off. We wanted bbq hotdogs and smoked sausages, but she doesn't own a BBQ. DIY problem solving to the rescue with one stainless steel strainer/steamer pot. when we're done cooking, we just put the strainer pot in the boiling pot, drop on the lid and let the charcoal die off.
🔥
Jan 30 •
How to make simple spreadable cheese
I call this Easy Peasy Squeezy (or spreadable) Cheese If you're a cheese lover, this simple, basic, 2 ingredient cheese recipe will be a hit for sure. It's a flexible and affordable option to those expensive store-bought brands. To get started, you'll need a few tools: Cheesecloth or lint-free cotton cloth 1 medium to large-sized strainer/sieve 1 large pot capable of holding 1 Gallon / 4L of liquid 1 large bowl capable of the same capacity as the pot. 1 wooden spoon for stirring A thermometer capable of at least 150 Deg Fahrenheit, a candy thermometer is ideal for this. A 3/4 cup measuring cup 4 wooden or plastic clothespins Jars for saving the whey For ingredients you'll need: 1 Gallon / 4L Jug of 3.25% milk or raw milk 3/4 cup 5% white vinegar. Your choice of herbs and spices. To make the cheese, follow these seven steps Step 1 – Place the large pot and milk on the stove & bring slowly to a temperature of 120 degrees Fahrenheit, use low to medium heat. Stir constantly to avoid scorching milk Step 2 – When milk has reached 120 Degrees Fahrenheit, remove from heat. Step 3 – Gently stir in 3/4 cup of 5% white vinegar. Let it sit for 30 minutes off the burner Step 4 – Place a strainer or sieve in/over a large bowl and place a lint free cotton cloth, or cheesecloth in the strainer or sieve and hold in place with clothespins. Step 5 – Strain pot contents through the cloth/cheese cloth and strainer to separate whey from curds Step 6 – Let the mixture sit until the whey stops dripping from the sieve/strainer. Bonus Whey tips at the end of the recipe. For thicker or firmer cheese, you can squeeze out more whey by hand. Step 7- When your cheese reaches the consistency or firmness you want, place it in a smaller bowl and mix in herbs and spices to taste. Let it stand in the refrigerator for 24 hours for the best flavour. Bonus tip: Save the whey! You can use the whey: - In pancakes - In soups - You can water your plants with it - If done with raw whole milk, you can try reheating the whey, add more vinegar, & repeat for more cheese!
🔥
Jan 23 •
Bone Broth Quick Guide
A while ago I posted a picture of some bone broth we had in the works. This morning I thought I would share a quick step by step on how to make it. First, in order to make bone broth, you'll need bones. Chicken bones, Beef bones, Deer Bones, doesn't matter. What does matter is that they have a) not been chewed on by whoever ate the meat. b) they haven't been from a dish that had a seasoning sauce used. A few dry spices is ok, but sauces tend to impart a strong flavor to the broth. This unwanted flavor limits what you can do with said broth. Next, for extra nutrition, you'll want to add some vegetables. We usually add some chopped onion, some chopped celery, and diced carrots. Toss in a couple bay leaves, and approximately 2 ounces of vinegar. As the broth does its cooking thing, most of the vitamins and minerals from the vegetables will cook out and stay in your broth. Next you'll need a large electric roaster or slow cooker with temperature control. put your bones, veggies, and bay leaves in the roaster or slow cooker and cover with water. Add the 2 ounces of vinegar. Set the roaster or slow cooker to 250 deg F and let it cook for 24 hours. ** Note** depending on what type of bones you've used, this cooking period may have a portion of time where the mixture has an odd smell... this is normal and it will go away as the bones cook down. Trust me, as it cooks it'll start to smell so so good. After the 24 hours has passed, turn the heat off and let the broth cool to room temperature. Strain the bones, veggies, and bay leaf mixture to remove the broth. You can toss this once the broth is removed, it's not worth keeping. You're done! If you plan on using the broth right away you can put it into jars and store in the refrigerator. For longer storage, you'll want to preserve it using a pressure canning method or freeze it. Should you choose to freeze it, remember to leave some space in the container to account for expansion as the broth get solid.
🔥
Jan 22 •
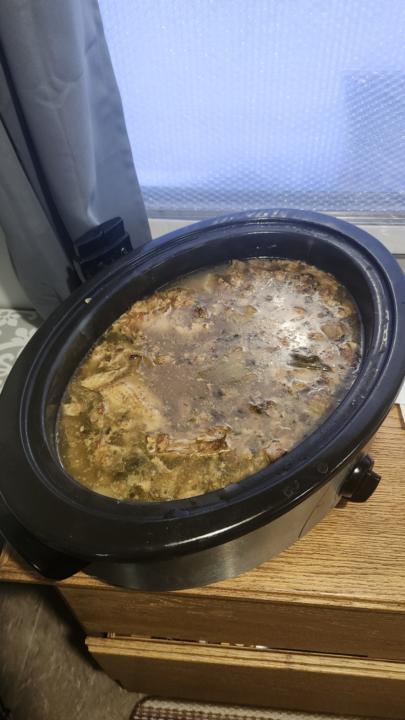
A whole lot of homemade goodness
MMM home made chicken bone broth... done the 24 hour cookin' phase , just needs to cool for straining then into jars for pressure canning. This is approximately 3 quart jars worth. We use as soup base and it's really good piping hot with a little salt and pepper on those cold winter days.
🔥
Dec '25 •
A Monday Milk and Money tip...
In our household, we consume a lot of milk. From breakfast cereals to egg wash for French toast and cream soup bases, we can use as much as 12 Litres or 3 gallons a week. It all depends on the season and what the meal plans are for that week. Because of this, I often kid around, saying we should get our own dairy cow. However, since a dairy cow in our current location is an impossibility, we have taken to buying our milk "en masse". Basically, when we get low, during our next shopping trip, we will purchase as many as six 4L /1-gallon jugs. Since we live in a rural area (A small hamlet with zero legitimate grocery services), doing this ensures we don't have to visit a store for milk every 2-3 days. This saves us making a roughly 100 km (60 mi) round trip, an hour and a half of our time, and about $10 to $15 in fuel costs, just for milk. When we get home, we simply open each jug, pour out 2 cups of milk from each one into the currently open jug, recap them, and put them in the freezer. This helps keep the milk past the expiry date in case any of the jugs were getting close. When we get down to approximately one-third of a jug of milk remaining in the refrigerator, we remove a jug from the freezer, place it in a large bowl to catch any condensation (and possible milk spillage), then wait roughly 24 hours for the milk to thaw. When the milk has thawed completely, we give the jug a good shake and bingo, good to go! Now I cannot stress enough how important it is to remove those 2 cups of milk from each jug. If you do not do this, when the milk freezes, it will expand. This expansion can and has caused the jugs to split and crack. IF a split or crack occurs, you may not notice it initially, but as the milk thaws, the jug will leak. Hence, the large bowl when thawing. Now I know this tip may not seem helpful for everyone, but keep in mind that unless you are within walking distance of a grocery store, any reduction in trips that require the use of a vehicle will save you money and time.
1-7 of 7
powered by

skool.com/the-pinchpenny-diyer-6725
With Pinchpenny DIY'er, we'll learn & share ways to save money through DIY. Topics include gardening, home repair, woodworking, and metal fabrication.
Suggested communities
Powered by