
Write something

🔥
Jan 12 •
How to Win the War Against "The Stall"
It’s 2:00 PM. You’ve been smoking that pork shoulder for 6 hours. The internal temp hit 165°F, and then... nothing. For three hours, the needle hasn't budged. Welcome to The Stall. Most beginners panic here. They think their fire is dying, so they dump in more charcoal, spike the heat to 300°F, and end up with a dry, tough mess. The Science: The Stall isn't about fat melting or the meat "resting" mid-cook. It’s Evaporative Cooling. Your meat is essentially "sweating." The moisture evaporating off the surface cools the meat just as fast as the smoker heats it. How a Pro Pitmaster handles it: 1️⃣ The "Patience" Play: If you have time and want the crunchiest bark possible, do nothing. Ride it out. Once the surface moisture evaporates, the temp will start climbing again. (Warning: This can add 2-4 hours to your cook!) 2️⃣ The "Texas Crutch" (Foil): Wrap that shoulder tightly in heavy-duty foil with a splash of apple cider. This traps the steam, kills the evaporation, and powers you through the stall in minutes. - Downside: It softens your bark. 3️⃣ The "Butcher Paper" Middle Ground: This is the $1,000 secret. Peach butcher paper is breathable. It traps enough heat to beat the stall but lets enough steam escape to keep your bark from turning into mush. The Golden Rule: Never, ever pull your meat during the stall. If you pull it at 165°F because you’re frustrated, you’re eating "pot roast." Hold the line until 203°F when the collagen finally turns into jelly.
3
0

🔥
Jan 9 •
Pork Pro Tip
If you’re still just "rubbing and praying," you’re playing the game on Hard Mode. Pork is a fat-heavy, flavor-soaking machine—if you know how to toggle the switches. Here are 3 tips to take your backyard cook to a $1,000 Masterclass level: 1. The "Cold Start" Smoke Ring 🧊 Stop letting your meat "come to room temp" on the counter. Myoglobin (the protein that turns pink/red) stops reacting to smoke once the meat hits 140°F. - The Hack: Put your pork on the smoker straight from the fridge. The colder the meat, the longer the chemical window stays open for that deep, neon-red smoke ring. 2. The "Fat-Cap Trap" 🔪 Most people leave the fat cap on a shoulder because "it melts into the meat." Myth. Fat doesn't "soak" into muscle fibers; it just runs off. - The Hack: Trim that fat cap down to 1/8th of an inch. If the fat is too thick, your rub is seasoning fat that’s just going to melt into the drip pan. You want your rub touching meat, not a 1-inch shield of grease. 3. The 15-Minute "Steam Vent" 💨 The biggest mistake? Wrapping your pork in foil at 203°F and putting it straight in a cooler. That meat is still "carrying over" heat. If you don't vent it, it keeps cooking and turns into mushy "pot roast" texture. - The Hack: When you pull it off the pit, open the foil for 15 minutes. Let the steam escape. Once the internal temp drops to 180°F, then seal it back up and put it in the cooler. This "locks in" the perfect texture. Bonus Tip: Spritz with Apple Cider Vinegar, not just Apple Juice. The acid helps break down the exterior proteins for a better "bite-through" on your ribs.
2
0

🔥
Jan 7 •
Science of the Pellicle
Let’s talk about Bark. Most people think bark is just burnt rub. It’s not. Bark is the result of a complex chemical marriage between your meat, your rub, and the smoke. If you’re getting "mushy" exteriors or bitter, black crusts, you’re missing the Pellicle. Here are 3 technical reasons your bark isn't hitting that "mahogany" pro-level: 1. The "Sticky" Factor (The Pellicle) Smoke particles are "tacky." They need a sticky surface to adhere to. If you put your pork in the smoker bone-dry, the smoke just bounces off. - The Fix: Apply your rub at least 30-60 minutes before the cook. The salt draws out proteins and moisture, creating a shiny, tacky layer called a pellicle. That is your smoke magnet. 2. The Solubility of Spices Did you know that certain spices in your rub are water-soluble, while others are fat-soluble? - Salt dissolves into the meat. - Pepper and Paprika do not; they stay on the surface to form the physical structure of the bark. - The Fix: Stop using binders like oil if you want a thick crust. Use a water-based binder (like mustard or apple juice) so the water-soluble ingredients can actually bond with the meat fibers. 3. The Vapor Pressure (The "Clean" Smoke) If your exhaust vent is halfway closed, you’re trapping "heavy" smoke. This creates creosote—that bitter, numbing flavor. - The Fix: Run your exhaust wide open. You want high airflow. Bark is created by evaporation. If the air isn't moving, the surface stays wet, and you’ll never get that "crunch." The Pro Tip: Next time you smoke a shoulder, don’t wrap it until the bark "sets." How do you know? Scratch it with your fingernail. If the rub stays on the meat, it’s set. If it pastes onto your finger, it’s not ready.
🔥
Dec '25 •
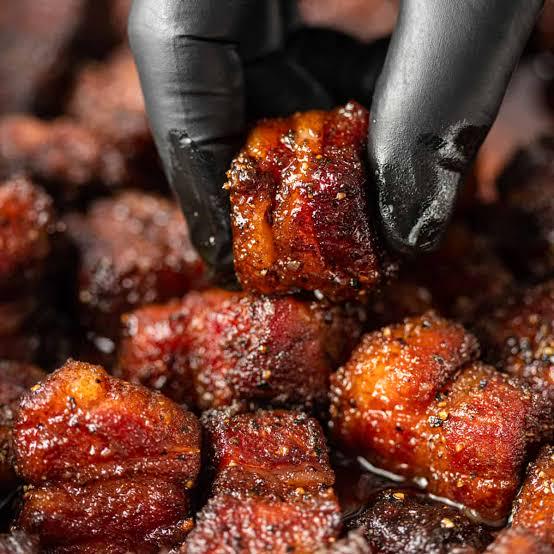
Pork Belly Candy
Pork belly burnt ends are the gateway drug of the BBQ world. There is nothing like that specific moment when the fat renders into literal butter and the glaze sets into a sticky lacquer. The secret sauce: Don’t over-sauce too early. Let the smoke do the heavy lifting for the first 3 hours, then braise them in the "holy trinity" (Butter, Brown Sugar, Honey) for that shine.
🔥
Dec '25 •
Spare Ribs
Spareribs (The Flavor King) Don't let the name fool you—these aren't "extra" or inferior. - The Location: They sit further down the side of the hog, reaching all the way to the breastbone. - The Meat: Unlike Baby Backs (where the meat is on top), Spareribs have the meat between the bones. Because they have more marbling and connective tissue, many pitmasters argue they are richer and more flavorful. - The Look: The bones are flatter and straighter. You'll find a meaty "flap" (the diaphragm) on the back and a strip of cartilage at the bottom called rib tips. The St. Louis Cut (The "Center Cut") Take a rugged slab of Spareribs, lop off the gristly rib tips, remove the loose flap meat, and you’re left with a perfect, rectangular St. Louis Cut. - Why we love it: It’s uniform, cooks evenly, and fits perfectly in a frying pan if you're cooking indoors. - Competition Standard: If you’re competing in a KCBS contest, this is your go-to cut. It looks beautiful in the turn-in box. - Cook Time: At a steady 225°F, these beauties take about 5 to 6 hours to reach smoky perfection. 📏 Long End vs. Short End? If you're at a legendary spot in the US, they might ask which half-slab you want: - The Long End: The first six ribs starting from the shoulder. - The Short End: These are slightly meatier and more tender. In some joints, you’ll even pay a $1 premium for the short end—and it's usually worth it! Pro Tip for the Butcher Shop If your butcher doesn't know what a "St. Louis Cut" is, don't panic. Just ask for "Spareribs with the tips removed." Or better yet, buy the full Sparerib slab, trim them yourself, and cook the tips on the side as a pitmaster snack!
8
0

1-6 of 6
powered by
skool.com/bbq-beer-and-whiskey-9787
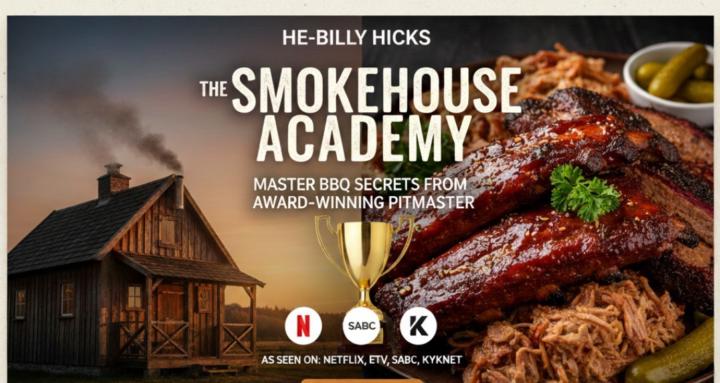
Award-winning pitmaster teaching BBQ, craft beer & whiskey-making. Join He-Billy Hicks' community of makers. Level up your craft. As seen on tv
Suggested communities
Powered by