Activity
Mon
Wed
Fri
Sun
Aug
Sep
Oct
Nov
Dec
Jan
Feb
Mar
Apr
May
Jun
Jul
What is this?
Less
More
Memberships
The Self-Taught AI Lab
460 members • Free
Sewing your dream clothes
1.2k members • Free
Krewe of Designers
26 members • Free
Patternless Sewing Skool
234 members • Free
6 contributions to Krewe of Designers

Feb 27 •
🦋 The Monarch Needs Her Wings: Yardage & Supplies
Alright, Krewe! To create the Monarch Maxi, we aren’t just sewing a dress; we are engineering a masterpiece. Because of that dramatic, floor-sweeping hem and the way the bodice transitions, your Yardage and Grainline are going to be your best friends today. 📐 Why Yardage Matters for the Monarch The Monarch is a fabric-hungry design. If you’re using a bold print (like its namesake butterfly patterns), you’ll need extra length to ensure your motifs align perfectly across the seams. The Monarch Yardage Guide: 45" Wide Fabric: You’ll need [6] yards. (Prepare for some creative pattern piece tetris!) 60" Wide Fabric: You’ll need [4.5] yards. The "Leah B." Buffer: I always recommend an extra 1/2 yard for the Monarch. Between the length of the panels and the "float" of the skirt, you don't want to be caught short during the final tier. 🛠️ The Monarch Toolkit Beyond your standard machine, make sure you have: Microtex Needles: If you’re choosing a flowy silk or viscose (highly recommended for that "Monarch wing" movement!). Horsehair Braid (Optional): For those who want that hem to really pop and hold its shape. Marking Tools: You’ll have several long darts and alignment points—make sure your chalk is sharp! 📸 Today’s Challenge: The Texture Board The Monarch looks different in every fabric. Are you going for "Ethereal Monarch" (chiffons/sheers) or "Statuesque Monarch" (brocades/structured cottons)? Drop a photo or a link in the comments of the fabric you’ve chosen! I’ll be hopping in to tell you if your choice will give you the "flutter" or the "form" you’re looking for. The pattern: https://www.tedooo.com/product/MEiIsknBd


1 like • Mar 1
The fabric makes it! This dress look like something that would fit many body types. I plan to buy this pattern and make one for me and my mom. 💗
Feb 14 •
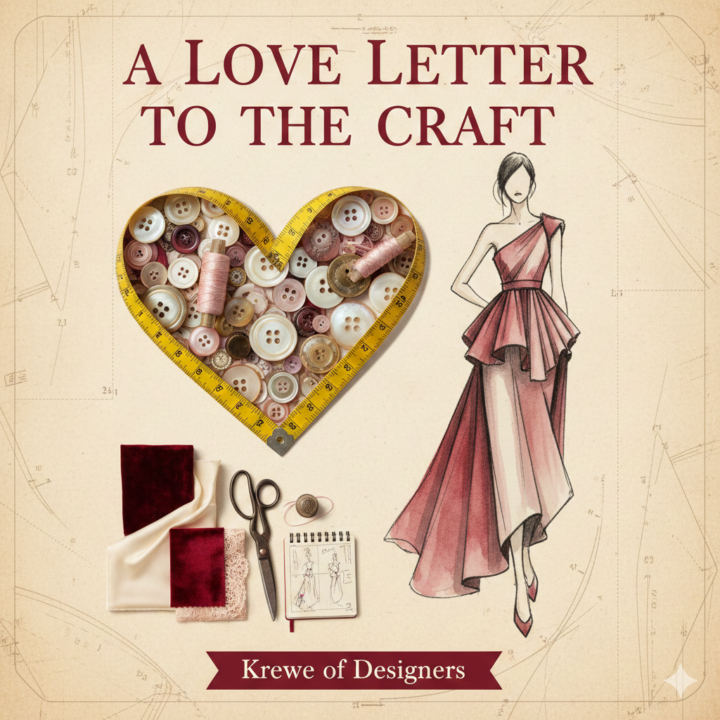
💖 Welcome to the Krewe: Falling in Love with the Process
Happy Valentine’s Day, Designers! They say do what you love, and you’ll never work a day in your life. Well, we know that’s not entirely true—designing is hard work! It involves precision, patience, and sometimes, a seam ripper. But today, on a day dedicated to love, we are kicking off a 14-day journey dedicated to the love of the craft. Welcome to the Krewe of Designers brand new course! Over the next two weeks, we aren’t just making a garment; we are diving deep into the "why" behind the "how." We are moving beyond just following instructions and stepping into the mindset of a true designer. I, Leah B., am thrilled to be your guide as we take a static pattern and breathe life into it. 🗺️ Your 14-Day Roadmap We’ve structured this course just like professional design development. Here is a sneak peek at the journey ahead: Phase 1: The Foundation (Days 1-4): We’ll handle the business side (IP & Rights), gather our tools, and select the perfect "canvas" (fabric). Phase 2: The Blueprint (Days 5-7): We dive into the technical side—the cut list and the art of drafting. Phase 3: The Build (Days 8-11): The main event. Step-by-step assembly with exclusive Pro Tips from the atelier. Phase 4: The Heart (Days 12-14): The inspiration story, the grand reveal of your work, and looking ahead to the next design. 🧵 Your First Assignment We are a Krewe—a community that supports each other’s growth. Let’s get the energy flowing in the comments below. Introduce yourself and tell us: What is the one part of the design process you absolutely LOVE? (Is it picking the fabric? The first cut? The final press?) Let the journey begin! — Leah B.
1 like • Feb 21
Hi. I'm Theresa. I live in Utah. My favorite part of design is shopping and picking fabric. The fabric then dictates what I make.
Jan 8 •
🔥 Day 2: The Power of the Press
Stitching is only half the battle! The biggest difference between a "homemade" look and a "boutique-quality" finish isn't your sewing machine—it’s your iron. Proper pressing molds the fabric and sets your stitches into the fibers. Pressing vs. Ironing Ironing: Sliding the iron back and forth (this can stretch and distort your fabric). Pressing: Lifting the iron and placing it down firmly in one spot (this sets the shape without stretching). The "Pro-Flow" Steps: Set the Stitch: Before opening the seam, press the seam exactly as it was sewn. This "melts" the thread into the fabric. Open it Up: Use the tip of your iron to press the seam allowances open (or to one side, depending on the pattern). The "Right Side" Finish: Give it a final press from the front side to ensure everything is perfectly flat. 💡 Pro Tip: The Tailor’s Clapper If you are working with thicker fabrics (like a coat or a collar), use a wooden Tailor’s Clapper. After pressing with steam, immediately press the wooden block onto the seam. The wood absorbs the steam and traps the heat, leaving you with an edge so crisp it looks like it came off a New York runway. Designer Note: "If you skip the iron, you’re just making clothes. When you press as you go, you’re creating fashion." — Leah B.
1 like • Jan 15
I didn't know! Ugh. And I love your designer quote 😍
Jan 9 •
🪡 Day 3: Needle Knowledge
Small Tool, Big Impact Think of your sewing machine needle like a high-performance tire on a car. If the tires are worn out or the wrong type for the road, the ride won't be smooth! 1. The "Golden Rule" of Timing Most designers wait until a needle breaks to change it. Don't do that! * The Rule: Change your needle after every 8 hours of sewing or at the start of every new project. A dull needle "punches" through fabric instead of piercing it. 2. Match the Needle to the Fabric Different fabrics require different points to ensure the thread passes through cleanly: Universal: Best for general woven fabrics (like cotton). Ballpoint/Stretch: Essential for knits and jerseys. The rounded tip slides between the fibers instead of cutting them (preventing holes!). Microtex/Sharp: Very slim and sharp. Use these for silks, microfibers, or when topstitching for that extra-crisp look. 3. Understanding the Numbers You’ll see numbers like 70/10 or 90/14 on the pack. Small Number (70/10): For lightweight, delicate fabrics (Chiffon, Silk). Large Number (90/14 or 100/16): For heavy fabrics (Denim, Canvas, Upholstery). 💡 Pro Tip: The Sound Test Listen to your machine. If you hear a rhythmic "thump-thump-thump" as the needle hits the fabric, it’s likely dull or too small for the material. Swap it out immediately! Designer Note: "Your needle is the frontline of your design. A fresh, correct needle is the cheapest way to instantly upgrade your stitch quality." — Leah B.
1 like • Jan 15
This is such helpful info!
Jan 13 •
⚖️ Day 5: Taming the Tension
The Great Tug-of-War If your stitches look loopy on the bottom, or your fabric is puckering like a raisin, your tension is out of balance. Think of your sewing machine as a game of Tug-of-War: the top thread and the bobbin thread need to pull with the exact same strength to meet perfectly in the middle of your fabric. 1. The "Bird’s Nest" (Loops on the Bottom) The Myth: "My bobbin is messed up!" The Reality: It’s actually your top thread. If you see a mess of loops underneath the fabric, the top thread isn't being held tight enough. It’s falling through the hole too fast. 2. The Pucker (Tight Stitches) If your fabric is gathering or "scrunching" as you sew, your tension is too tight. The threads are pulling so hard they’re crushing the fabric fibers. The "90% Rule" Fix: Before you touch those tension dials, do this: Rethread with the Foot UP: This is the #1 mistake! When the presser foot is down, the tension discs are closed. If you thread while the foot is down, the thread can't get inside the discs. Always lift the presser foot, rethread the top, then rethread the bobbin. 9 times out of 10, this fixes the problem! 💡 Pro Tip: The Two-Color Test If you’re really struggling to see what’s wrong, use a red thread on top and a blue thread in the bobbin. Sew a straight line on a scrap of white fabric. If you see red dots on the bottom, the top is too loose. If you see blue dots on the top, the top is too tight. Designer Note: "Don’t let a 'bird's nest' ruin your creative flow. Most 'machine problems' are actually just 'threading problems.' Take a breath, unthread, and start fresh." — Leah B.
1 like • Jan 15
Great way to explain it 🙌🏽
1-6 of 6

@theresa-ulibarri-9191
OWN it! is my motto. You don’t like it? It’s up to you to change it. OWN your life. Resilience is the key.
Active 1d ago
Joined Jan 13, 2026
ENFP
Utah