Activity
Mon
Wed
Fri
Sun
Aug
Sep
Oct
Nov
Dec
Jan
Feb
Mar
Apr
May
Jun
What is this?
Less
More
Memberships
Tradesmen roundtable
8 members • Free
Lots Of Projects - Engineering
237 members • Free
BestGunDogs Training Community
224 members • Free
The Welder’s Workshop
58 members • Free
KULLYCO Academy
723 members • Free
Welding/Fab SKOOL
522 members • Free
METAL LAB
126 members • Free
5 contributions to METAL LAB

Feb 9 •
Cnc plasma cutting
Cut these European mount deer hangers today out of 14ga steel. Had a bunch of scrap on two 4x8 sheet, and ended up cutting about 50 of them. The easiest way I have found to remove the millscale and dross, if not crunched on time, is to soak in 50/50 muriatic acid and water for a few hrs. Make sure you neutralize the acid before touching, or it will burn you!
0
0

Nov '25 •
OFFICIAL PHOTO CONTEST INFORMATION
Metal Lab Member Photo Contest: "Mastery of the Material" 1. Overview and Theme This contest is organized exclusively for active members of the Metal Lab to showcase their skills, creativity, and perspective on the craft. •theme: personal passions • Submissions should capture the things that make you you the things that you are passionate about art ,family, racing, fishing whatever it is that drives you through the week so you can enjoy your weekend doing what you love We're looking for images that highlight the beauty in the details, the diversity and at the same time unity of the people in our lives the precision of a cut, or the artistic finality of a creation 2. Eligibility and Timeline • Eligibility: The contest is open only to current, active members of the Metal Lab. • Contest Start Date: Thursday, November 6, 2025 • Submission Deadline: Thursday, November 20, 2025, at 11:59 PM EST • Winners Announced: We aim to announce the winners by Friday, November 24th 2025. 3. Submission Guidelines • Number of Entries: Each Metal Lab member may submit a maximum of three (3) photographs BUT only one will be considered of the three • Format: Images must be submitted in high-resolution JPEG (.jpg) format. • How to Submit: 1. Email your photos to [email protected] 2. Use the subject line: Photo Contest Entry - [Your Full Name]. 3. In the body of the email, you must include: • The Title for each photo. • A brief description (max 50 words) for each photo explaining what it shows and its connection to the theme.(preferred but not required) 4. Judging Criteria Entries will be judged by a designated panel based on the following criteria (weighted equally): 1. Relevance to the theme -(personal passions): How well the image aligns with and interprets the contest theme. 2. Technical Quality: Focus, lighting, exposure, and clarity of the photograph unless these elements are being used in an artistic way without any editing /filters 3. Composition and Creativity: The artistic merit, framing, and overall visual appeal of the image.
1 like • Nov '25
Can't wait
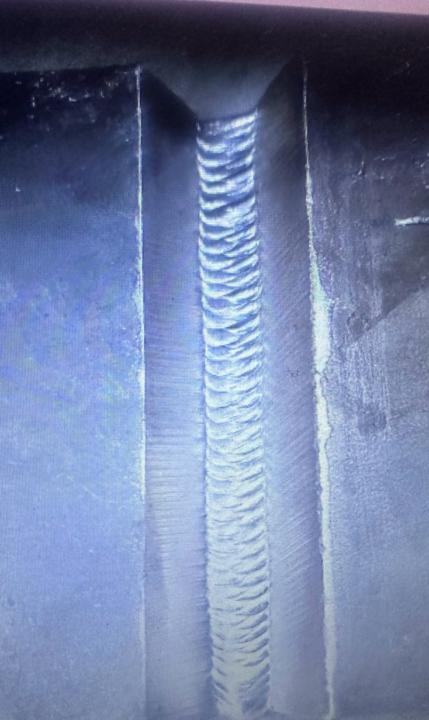
Nov '25 •
Here’s some vertical uphill hardwire
I had to certify for 1” here’s my root and hot pass feel free to rate it but only if you post yours next 😜🤣
1 like • Nov '25
Looks good
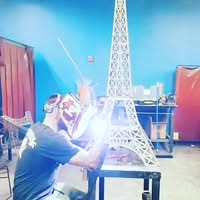
Nov '25 •
First request this is what I want more of
Thank you for requesting this post hope it answers your question So the question was “Are aluminum TIG welds supposed to be hazy or shiny?” The answer is tricky but as a whole Shiny is the goal for TIG aluminum welds , as a dull or hazy finish often tells us that there is some form of oxidation or contamination. Getting a shiny bead requires balancing heat input, proper gas coverage, clean base metal, and correct machine settings balancing the heat is done by using the foot pedal to lower and raise your amperage as needed aluminum gets real hot real fast so foot pedals are pretty much necessary with aluminum proper gas coverage isn’t just about flow rate and cup size it’s about your angle just as much but a size 8 cup is what I prefer for most aluminum jobs but that’s preference mostly remember as well that too much gas flow can cause the Venturi effect I’ll talk more about that later clean clean clean clean the metal first remembering that aluminum isn’t like steel check the aluminum lesson for more info if you don’t already know what I mean (tip to think about “your filler rod is also aluminum…keep it within the gas shield and clean it too!!” And as far as correct machine settings your amperage is dependent on your travel speed which depends on your style But the ac balance is dependent on your base metal and whether or not you want more cleaning action (+) or more penetration (-) more cleaning will cause your tungsten to ball up more and quicker and also you will see more frost around the toe of your welds here’s a few tips hope this helps - Clean the base metal: Thoroughly clean the aluminum with a stainless steel wire brush designated only for aluminum before welding. Any residue or oxide layer from improper cleaning will cause a dull finish - Optimize AC balance and frequency: Adjust your AC balance setting toward the electrode positive side to increase the cleaning action. Too much electrode negative can cause contamination and a dull finish. - Use proper gas coverage: Ensure you have sufficient shielding gas flow and use a gas lens with a larger cup. This helps prevent oxygen from reaching the molten puddle, which is a primary cause of haziness. - Control heat input: A dull finish can be a sign of overheating, causing you to weld too slowly. Use sufficient amperage to create a puddle quickly, and then use your foot pedal to control the heat. A smaller heat-affected zone is more likely to have a shiny finish. - Consider the filler material and tungsten:Some filler alloys can lead to a slightly less shiny finish. Use the correct tungsten for AC welding, and consider the benefits of using 2% lanthanated tungsten. - Maintain a consistent arc: Keep a tight and consistent arc to prevent the arc from wandering. An excessive arc length can lead to a loss of gas quality and therefore contamination.
1 like • Nov '25
Thank you. This answered alot of my questions
1 like • Nov '25
We are twins
Nov '25 •
U.V. Test results
🤷♂️hate to admit it but I’ve spent $20 a day keeping oil in my bike while I tried to figure out where the leak was coming from so $200 worth of oil blown out onto my foot and chain and then slung everywhere for a week and the UV showed my that the leak was coming from my cracked oil filter so thank god it was an easy fix and not a blown gasket or something requiring me to take the motor apart but dang I feel dumb hahaha although not my fault still
1 like • Nov '25
Glad it was something simple to fix
1-5 of 5

Active 14h ago
Joined Nov 2, 2025