
Write something

May 13 •
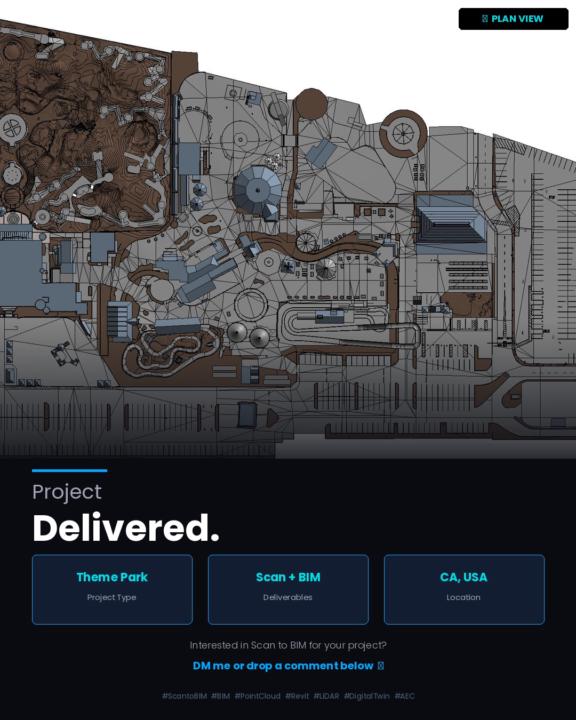
Millions of Points. One Clean Model.
A theme park in California — fully documented from raw point cloud to a complete Revit BIM model. Every ride, structure, path, utility line, and site element modeled. The kind of project where the scan data alone runs into the hundreds of millions of points, and the challenge is turning that chaos into something a contractor or architect can actually use. 360° scan coverage. Full site. Delivered.
1
0
May 13 •
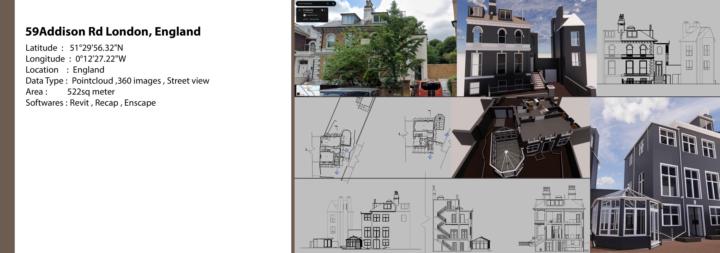
From Point Cloud to Revit — London Victorian Residence
📍 59 Addison Rd, London, England Victorian-era residential property — 522 sqm of complex geometry, multiple rooflines, bay windows, and a rear conservatory extension. Not the easiest scan-to-BIM job, but that's exactly what makes it interesting. Data captured via point cloud + 360 imagery + street view references, then processed through ReCap and modeled in Revit from ground up — floor plans, all four elevations, sections, and a full 3D model rendered in Enscape. The challenge with older UK properties like this one is the irregularity — nothing is perfectly plumb or square, and the scan data tells you that immediately. The model has to reflect reality, not idealize it. Coordinates: 51°29'56.32"N, 0°12'27.22"W Tools: Revit · ReCap · Enscape #ScantoBIM #PointCloud #Revit #RealityCapture #BIM #LondonArchitecture #AsBuilt #Enscape #ArchitecturalDocumentation #LIDAR
0
0
May 12 •
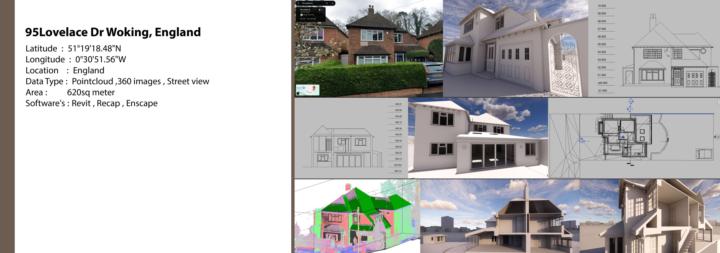
As-built Revit model and Drawings !
🏡 95 Lovelace Dr, Woking, England | Scan to BIM From point cloud to a fully detailed Revit model — here's a complete residential Scan to BIM project delivered for a property in England. 📍 Location: Woking, England 📐 Area: 620 sqm 🔧 Data Type: Point Cloud + 360 Images + Street View 💻 Software: Revit | ReCap | Enscape What we delivered: ✅ Accurate 3D Revit model from point cloud ✅ Architectural floor plans & sections ✅ Elevations with precise dimensions ✅ Enscape renders for visual presentation ✅ Full exterior & interior geometry captured Whether you have scan data or just 360 images — we convert it into a clean, accurate BIM model ready for design or renovation work. 📩 Have a project? Let's talk!

May 6 •
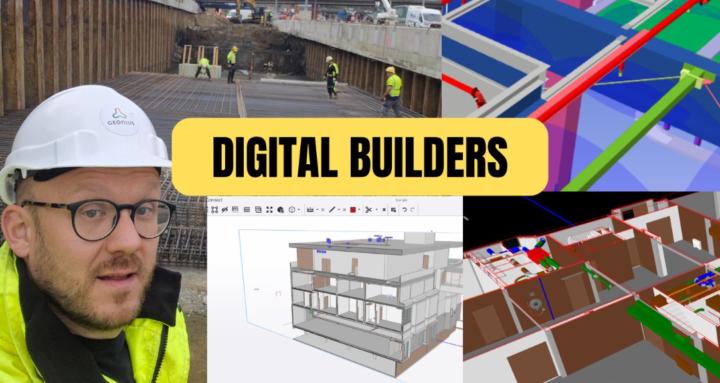
Everything in BIM Felt Overwhelming… Until I Understood the Foundation
When I started with BIM, everything felt overwhelming.Revit modeling, templates, BIM coordination, standards, clash detection, data, CDEs, BCF… it felt like you needed to understand everything at once. And honestly? That’s where many people give up. That’s exactly why I created this community.Not to make BIM more complicated, but to make it accessible. Step by step.Practical.Low threshold.Focused on what you actually need to start working efficiently. No overload. No unnecessary complexity. Just clear guidance through the world of BIM and digital construction. And where do we start?With the foundation: the CDE. Because without a good structure, everything becomes chaos. If you ever felt overwhelmed by BIM, this community is for you.
0
0
May 3 •
Sharing my learning path
I would like to share more of my learning journey through this channel. I have been working in the construction sector for over 10 years now, and actually, the working method hasn't changed much since then. BIM coordination is not about simply clashing models, but about providing insight and truly making a difference regarding node deviations and the like. I will share more of my insights here regarding digital twins and data management, because we share our models to be part of the subsequent management and maintenance. Kind regards Benjamin
Poll
1 member has voted
0
0
1-13 of 13
powered by
skool.com/bim-coordination-academy-6993
From site to system learn BIM, tools & real workflows to build smarter, connect teams, and deliver better projects
Suggested communities
Powered by