Activity
Mon
Wed
Fri
Sun
Aug
Sep
Oct
Nov
Dec
Jan
Feb
Mar
Apr
May
Jun
Jul
What is this?
Less
More
Owned by Threy
A page dedicated to the teaching and discussion of the art of bow building and spreading the knowledge around the world.
Memberships
Skoolers
165.5k members • Free
15 contributions to Bow Building 101

10d •
High performance Hunting Bow Build: Tillering
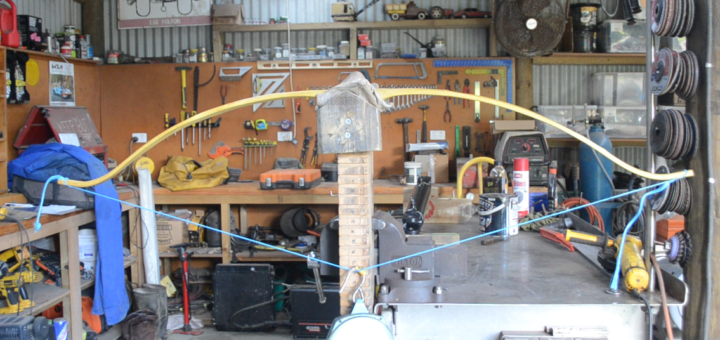
With the limbs of the bow balanced we can now begin tillering the bow. As the bow limbs are already balanced this will be tremendously easier than if not. This is much easier when done on a tillering tree, a diagram is available on page as a reference. There are also many videos online as to how to construct a tillering tree. Placing the bow on the tree while braced we can hook the scale onto the string. Stepping back we can give the bow string a few tentative pulls. Observe the bend of the limbs and how they flex monitoring any areas showing excessive bend. If some areas are stiff or excessively weak now is the time to address them. If an area is weak mark it with a pencil and avoid removing material from it. We will then weaken the other limb and stiff areas by taking material off with the card scraper. If an area is too stiff simply take material off with the scraper before exercising the limbs and bracing once more. When the bow limbs are bending evenly showing no sign of excessively stiff or weak areas we can then draw the bow to full design weight. Using the scale monitor how much weight the bow is displaying at a given draw length. For a 60lb bow we draw to roughly 27kg, for a 50lb bow we draw to 22kg etc. Pull the bow gently to full design weight this should only take a small amount of draw to achieve at this stage. Draw the bow a few times to the full design weight observing the bend of the limbs. As we've already balanced the limbs even scrapes should now be taken off each limb. This can be done while the bow is braced but is made easier if unbraced at this stage. Count the strokes ensuring that the same amount is taken off each limb. With the material removed we can place the braced bow back on the tillering tree. We then pull to half design weight 15 times before drawing to full design weight another 15. This exercises the limbs while the bow is braced. Once again pull the bow to full design weight observing the bend of the limbs before marking, scraping, exercising and drawing once more.
1
0
10d •
High performance Hunting Bow Build: Bracing & Balancing the Limbs
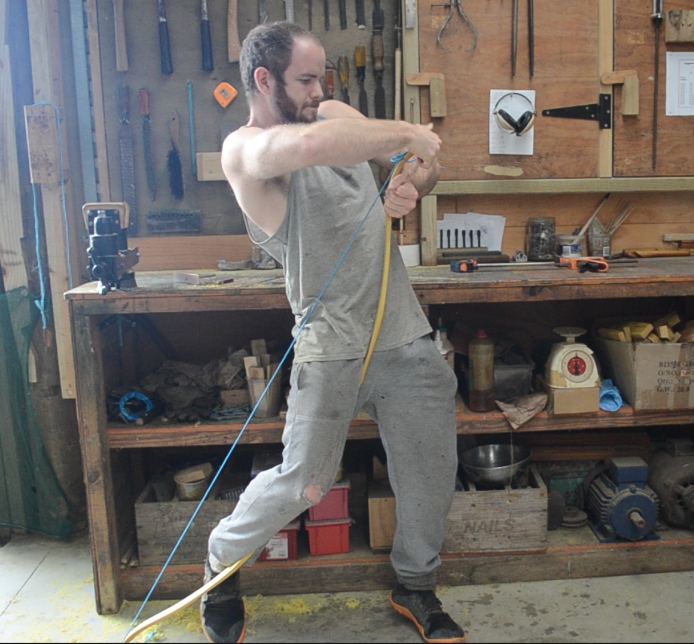
To start with we will set the bow at a low brace height as to get a feel for how the limbs are bending. Low brace is a reference to how far the string is off the handle when the bow is strung. You can prepare a custom string for this or use any strong cordage you have available, bailing twine works very well for this task. As before we place one end of the bow on the ground before placing one left over the handle area. We then use our hand to push the top bow tip bending the limbs. This allows us to slip the string over the nock. You can also use your knee to bend the handle down if its more comfortable for you. With the bow at low brace we can now check the limb balance. At this stage do not pull the string at all as this can overstress any weak areas on the limbs. Mark any stiff areas or an entire limb if one is stiff once again making sure to not remove material from the recurves. While braced you can also run the tillering gizmo over the limbs if you want to double check your markings. Using the card scraper take even and counted strokes from the stiff areas. Ensure that both sides of the limb remain even when removing material as to not weaken one side more than the other. Once material has been removed we can unbrace the bow and exercise the limbs against the ground to give the wood a new memory. We can then brace the bow once more before continuing. We repeat this procedure step by step until the limbs are as balanced as can be. Photos Left: Bracing the bow using my knee Right: Checking the balance of the limbs and marking stiff areas
1
0
10d •
High Performance Hunting Bow Build: Tillering & Cutting String Nocks
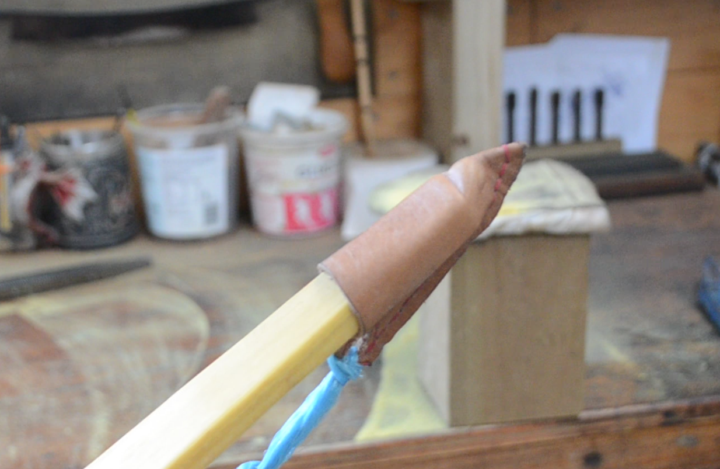
Now that our recurves are in place we can now move onto balancing the limbs and bracing the bow. Placing the bow sideways in the vice again we can continue our removal of wood in stiff areas. If the limb is already well balanced we can take even ammounts off with the shinto rasp. If you would like to slow down even further for more control you can start using the card scraper. Use this to to take thin wisps of wood off instead. Continue slowly removing material until both limbs bend evenly. The limbs should feel the same in terms of stiffness when bent. I also use a string jig with leather hoops on the end that fit over the end of the bow tips. The bow is then placed on the tillering tree before the string is drawn pulling the limbs down. This is another method to gauge the bend of the limbs known as long string tillering. I use this in tandem with side tillering in the vice. Once the bow is bending around 8 inches with a moderate amount of pressure we can then move onto cutting the string nocks. Measure half an inch back from the tip of the bow and make a mark accross the back. Then measure 1 inch from the tip of the bow making a mark accross the belly. Connect these two points giving you a roughly 45 degree angle at which to cut your nock. Using a tile saw cut along these lines on the sides of the bows tip before widening with a chainsaw file. These nocks can then be sanded smooth as to not abrade the string. Once complete the bow is now ready for bracing. Photos left to right: 1.Leather loops used for long string tillering at the early stages. 2.The bow being bent using a long string 3.Marking stiff areas for wood removal 4.Marking the nocks 5.Cutting the nocks with a tile saw. 6. Widening the nocks with a chainsaw file
1
0
10d •
High Performance Hunting Bow Build: Recurving
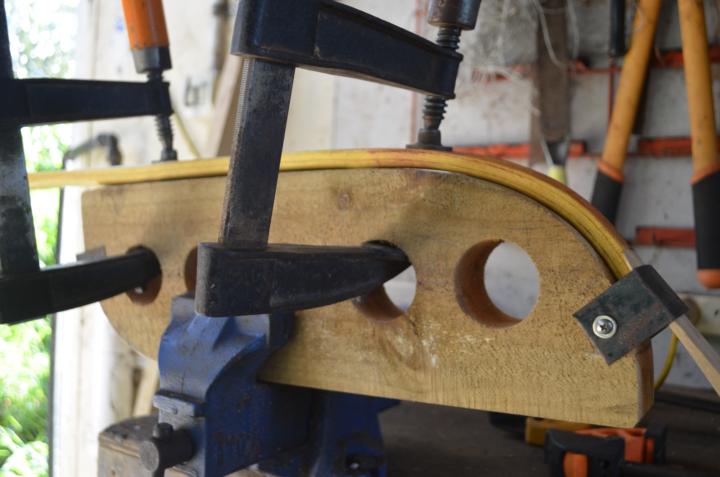
Now that the limbs bend roughly even its time to recurve the tips. This will add extra early draw tension to the bow and increase arrow speed if well executed. This is not a necessary step but can be very helpful when creating a higher performing bow. To ensure we don't lift any splinters when recurving its highly recommended that you chase a ring on the belly. Leaving extra belly material at the tips will come in handy now. Using the card scraper we can chase a ring on the last 8 to 9 inches of the limb tips. Work slowly and carefully using the scraper to remove the early wood remnants until you have a clean belly area. Ideally the bows tips should be just over a half inch thick after chasing a ring on the belly tips. With our bow prepared we can now build a recurving caul. This is a great investment for future recurving and will help you to get even and symmetrical tips. You may have build one of these already for your personal bow making needs . If not now would be the time to do so. You can continue without recurving this bow if you'd like it's up to you. Many examples of recurve cauls can be found online and are quite simple to make. I have attached photos of my own in this post. Another post detailing them can be found in the tools section of the page. The safest way to recurve bow tips is to boil or steam them. I've found the easiest way to accomplish this is to place a pot of water on a stove or fireplace. Bring it to a low boil until it produces steam before placing the tip of the bow over the pot. Then placing foil over the pots rim wrapping it around the bow limb. Ensure there are minimal gaps for steam to escape before allowing the tip to be steamed for 30 minutes. The rule of thumb is 30 minutes of steaming per half inch of wood. While the bow tip is steaming we can prepare our caul. An easy method is to clamp it to something sturdy or use a nearby bench vice is available. Prepare your clamps in advance having them nearby and ready to go. Once the tip has been steamed for half an hour we remove it from the foil and quickly place the tip in the metal sleeve. Check the handle is upright so you are bending the bow the correct way. Next bend the bow downward in a slow and controlled fashion before clamping in place. Inspect the bend ensuring it's even and follows the caul. You can add extra clamps to adjust the shape if need be. As an additional step I then lightly heat the recurve with a heatgun while in the form. Just enough to change the color on the belly of the recurve. This helps to lock in the shape as well as prevent it from pulling out when in use.
1
0
10d •
High performance Hunting Bow Build: Floor Tillering
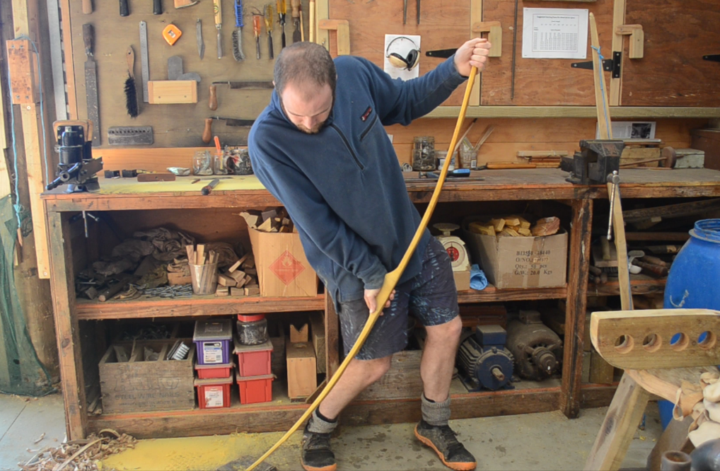
Take the newly thinned by and put the limb tip on the ground putting pressure on the handle area. The limbs may still be too stiff to move at this stage. Check where if any bend occurs and mark the stiff areas of the limbs. We then return the bow to the vice and remove material from the stiff limb areas. The shinto rasp is best suited for the job at this stage. Once the limb is bending to a moderate degree we can turn the bow sideways in the vice. We can then bend the bow by hand sighting down the limb for any stiff spots. Mark the stiff areas before removing material with the shinto rasp once more. We can then exercise the limbs between material removal and re-marking stiff areas. Exercising the limb is as simply as flexing the limbs by hand to allow the wood to gain a new memory essentially training the limbs to bend. Additionally you can run a tillering gizmo over the limbs while held in the vice sideways. This will help you remove material where needed if you want to double check your own tiller. A tillering gizmo will be discussed in another post or you can search on YouTube to create your own. Left photo: An example of floor tillering the stave. Right photo: Thinning stiff areas on the limb with a shinto rasp.
1
0
1-10 of 15
@threy-cameron-1234
I'm Threy Cameron a professional Bowyer hailing from New Zealand.
Active 3d ago
Joined May 20, 2026
INTJ